Create a staging site
Create a Managed WordPress staging site to test changes without affecting your live site.
Note:Staging sites are available if you have a Deluxe, Ultimate, Developer, or Pro Managed WordPress account. If you have a Basic account, you need to upgrade your account to use a staging site.
- Go to your Heart Internet control panel and open the Managed WordPress product page.
- In your My Products page, next to Managed WordPress, select Manage All.
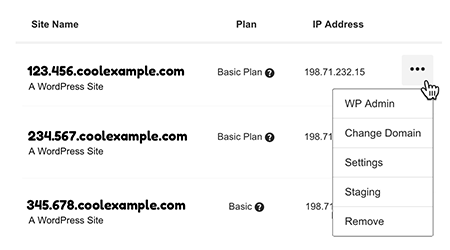
- For the site you want to use, select the
 menu and then select Staging.
- Select Create Staging Site.
Note:If you've got a Pro account (available only in U.S.A. and Canada), that's all you need to do. It'll take a few minutes for us to make a copy of your production site to use as a staging site. For Deluxe, Ultimate, and Developer accounts, continue with the next step.
- Decide how you want to stage your site by choosing:
- Clone from production: To copy your entire existing site into a staging site.
- Copy site design: To only copy your existing themes and plugins with no content.
- Select Create. It'll take a few minutes for us to create the staging site.
Article ID: 1178
Created On: Tue, Nov 17, 2020 at 5:47 PM
Last Updated On: Tue, Nov 17, 2020 at 5:47 PM
Online URL: https://www.heartinternet.uk/support/article/create-a-staging-site.html