Forget tarantulas, Darth Vader and the definitive list of Wikipedia Entries To Read In The Dark, there’s nothing more intimidating than this:
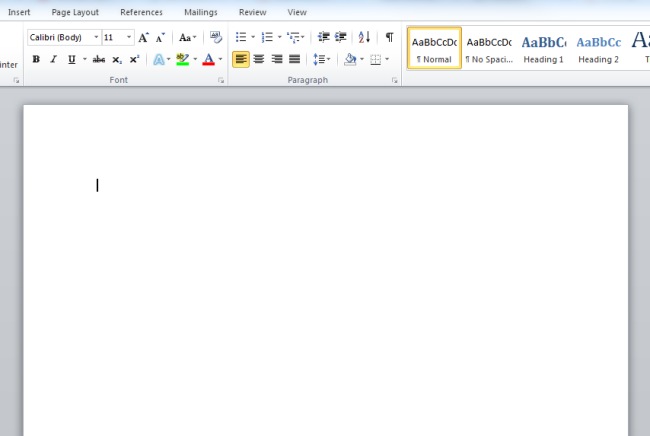
The second you need to think of an idea or a beginning, it’s typical that you can’t think of anything…especially when you’re faced with a medium that isn’t your natural comfort zone.
Luckily, as a designer, your creativity gene has almost definitely already been confirmed.
Having a solid foundation for expression to begin with means it’s just an extra step to translate the visual into the written…after all, every time you get a design brief, you’re doing the reverse. A few simple tweaks to your approach can make your writing tasks for the web better, more efficient, and enjoyable.
Getting started
Okay, so maybe you need to write a blog post or a page of copy or a short bio, and your first step is opening up your choice of dreaded text editor. Forget about that and words for the moment, and instead find some imagery that represents your story. Ideally, you want an image (or collection of images) that not only represent what you want to say, but how you want to say it. This will be determined by your audience and their interests, but also needs to be balanced with your own likes and goals to create a sustainable happy medium.
Native web authors tend to add appropriate images in after they’ve finished the written work. As a designer, it makes sense that you start with imagery because it’s where your particular strength lies. If you’re reasonably confident in your writing already, it’s enough just to do a quick Google Image search or spend a few minutes thinking about the concept you want to portray. If you have less writing experience, it can be more beneficial to concentrate on a specific image and describe it or build a story or article around it until you’re happy with the ‘translation’ before moving on.
Once you’ve decided on an image style, you can use it directly to determine the tone of your writing. For example, cartoons in a blog post instantly set a friendly, light-hearted tone for your surrounding writing whilst conceptual business images on a website page suggest authoritative and informative language. This direct translation from visual to written can be applied in a range of different ways (e.g. with fonts, colour palettes and so on).
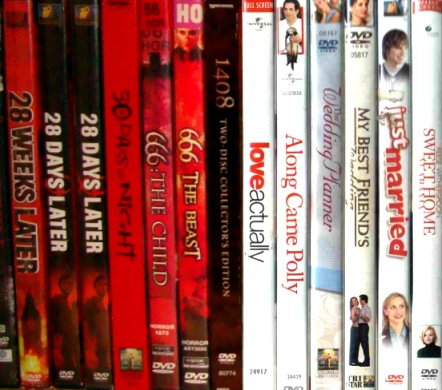
You don’t have to have even have heard of any of these films to be able to guess the genre with a split-second glance (original image credit: 1, 2).
Music can also be really helpful in invoking the right tone for writing: simply match your playlist to your task. If you find yourself paying too much attention to the song lyrics, try something in a foreign language or with no words (orchestral Final Fantasy and Chrono Trigger are popular choices in the Heart Internet office).
Developing a visual planning process
As a designer, you’re often asked to create an image or symbol to represent written text, so try reverse engineering the process for your writing. Avoid literally describing what you see and instead let your thoughts drift around the image, topic and task to avoid putting too much pressure on yourself straight away.
Rough sketches and concepts can fill in the blanks for the words you can’t find; practise captioning or write a brief sentence about the type of image you’re looking for to illustrate your point, then write round it. Doodling with good old-fashioned pencil and paper and hand-writing around concepts is great for brainstorming and bulking up your ideas. When you’re back in front of your computer, aim for an image every couple of paragraphs to start with; you can always remove redundant ones or replace them with better alternatives later.
Once you’ve laid the foundations with a visual theme, you’ll find your writing automatically becomes more structured and you’ll naturally end up alternating between imagery and words as your page develops. Writing as a designer also has specific unique strengths; for example, conceptual imagery and themes are a lot easier to develop and tend to be more successful compared to traditional writers’ attempts.

Create the idea of unlimited space and limitless imagination for your products and services with literal images of the universe. This one is part of a free set from the Hubble telescope.
Building emotion and action
Emotion isn’t just the domain of fiction. It may be more subtle, but you need to nudge the reader towards specific feelings and actions regardless of whether you’re writing a novel or a presales webpage. How do you want your reader to respond? What do you want them to do as a result of reading? Again, it’s similar to the design process in terms of the purpose of your creation and the shared experience between creator and recipient.
The tone and approach you’re aiming for is easy to represent visually by creating a mood board for your words using Pinterest or a similar site. You could create boards per task, per concept or just for general inspiration. It’s also helpful to have separate boards for resources and ideas you’re likely to keep coming back to or find particularly useful.
A quick way to find the types of images you’re looking for is to conduct Pinterest searches using specific abstract or concrete words. Abstract searches (e.g. ‘love’) tend to throw up much more in the way of quotes, typography examples, and conceptual images. If you’re looking for literal images and photos, use concrete verbs and nouns like ‘climb’ or ‘home’.
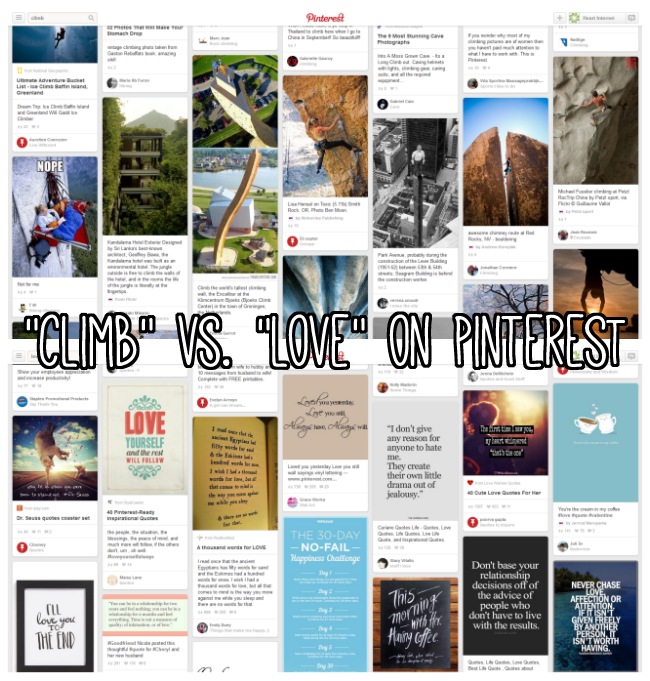
The top half of the image shows search results for “climb” and the bottom half “love”.
Structuring your writing
One of the easiest ways to organise your writing and structure your story (every piece of writing is a story and creates a journey, regardless of whether it’s literally fiction or not) is to divide it into a series of individual blocks of images. This gives you a storyboard which helps you structure the different sections of your piece, whether it’s as simple as Introduction – Body Content – Conclusion, or specific detailed sections.
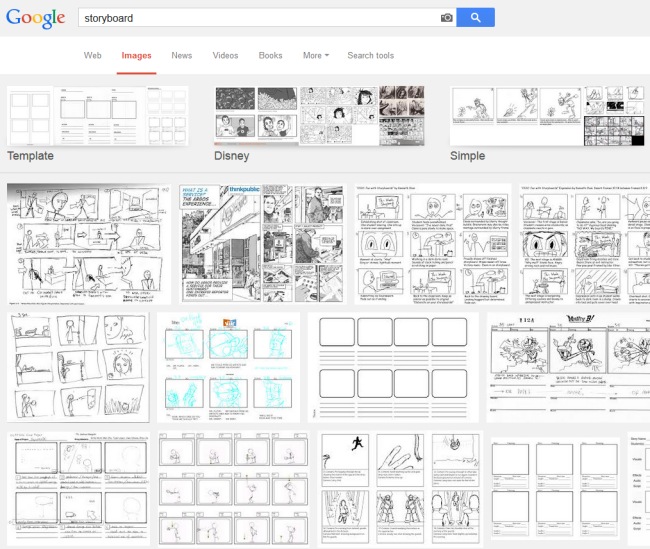
There are plenty of examples and free templates available on the web for inspiration.
Stick to stick figures and outlines to speed things up, or save for larger/more important pieces of writing. Depending on the time, resources and project, your sketches may have added value for a client or reader so always keep them stored carefully – you just never know when they might come in useful!
Storyboards are also great for using later on in your writing process, for example if you’re having trouble deciding what order sections of writing should go in or you want to split a long paragraph/idea up into several smaller ones. They’re useful at any stage to help you stay organised and on track. If you find them an invaluable part of your thinking process, take the time to make one or two more detailed sketches that can either be included within your piece or add personality to a project or another website elsewhere.
Don’t sweat the small stuff
The most important part is getting your general point down on paper to start with. Don’t worry about spelling and grammar until your last draft; concept and flow are much more important. It’s also a good idea to avoid judging your piece until it’s at the final proofing and editing stages to avoid feeling despondent or seeing typical designer perfectionism creeping in. Think of this point as the equivalent of tidying up spacing, alignment and other small changes once you’ve finished the main elements of a design. They are important, but they aren’t vital early on and can be a distraction more than anything else.
Once you’re happy, always read your piece out loud to see how it sounds. This is where you’ll catch stiltedness, overly long sentences, and instances of the wrong tone or tense. Don’t give yourself a hard time or expect to be the next Stephen Fry straightaway… you’ll naturally improve over time, and it can be useful to keep older pieces to dig out and rewrite every so often (‘About me’ pages in particular are excellent for this). Most importantly, embrace it and enjoy it for what it fundamentally is – another form of creative expression.
How do you approach writing as a designer? Let us know in the comments!
