We’ve had a few requests from our reseller hosting customers wanting to know how they can incorporate their own logo into a HostPay installation that uses a gradient as a background image.
I’ve created a tutorial to show you how easy it is to create your own gradient background and also seamlessly overlay your logo over the top.
For this demonstration I’ll be using Adobe Fireworks to create the graphics needed, the same method can be applied using other popular graphics package including The GIMP (Freeware), Adobe Photoshop etc, though the way an effect is achieved may vary from package to package. The final result will create two separate images, a thin 5px width gradient graphic that goes from light to dark blue and a transparent logo.
Click here to view the demo
Click here to download the source files which will include the html, images and the css with full commenting.
Creating a Gradient
Step one: Create the Canvas
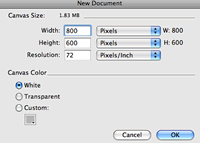
Go to: File > New and create a canvas that measures 800px (Width) x 600px (Height) and give it a white background.
Step two: Create a vector box
Draw a rectangle that measures 800px by 150px so it spans the full width of the canvas.
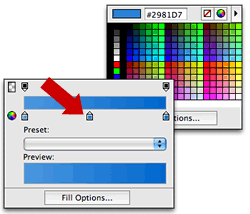
Next, apply a vertical linear gradient to the vector so the top (lighter) colour has the value of #4E99E0 and the bottom (darker) colour has the value of #0066CC.

Step three: Exporting the gradient
We’ll be using CSS to tile the background horizontally across the header so we’ll only need a small 5px slice of the actual gradient image, this way we can save on file size and page load times.
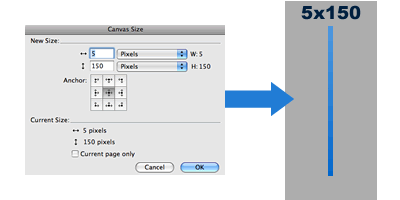
To do this create a new canvas that measures 5px (width) x 150px (height) and copy and paste the gradient into this canvas.
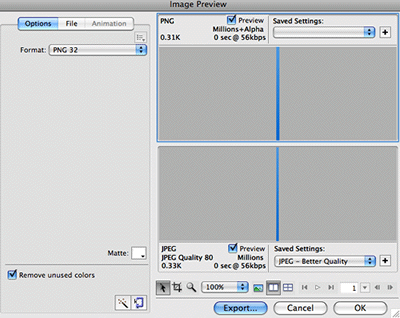
To export/save this graphic, go to: File > Export Wizard > Continue > (Click “The Web”) Continue > (Click Exit if it appears) > Then on the “Format” option on the drop down click “PNG 32” > Click “Export” > then save your file as gradient.png
Note:
You can also use the slice tool to export a 5px x 150px slice, make sure you select PNG 32 within the “Optimize” window (F8)
You have now created a gradient which we can use as the main background of the header.
Creating a transparent logo
Step one: Setting up the logo
Open your logo in a new canvas by going to File > Open > (Browse to your logo) and click “Open”. Make sure the logo is sat on a transparent background, if your logo sits on a coloured background please see the notes at the bottom of this section.
Set the background colour of the canvas to the “mid” colour of the gradient, this is important as it ensures the logo blends seamlessly with the background when used on the website.
Step two: Exporting the logo
Much like the method in exporting the gradient:
Go to: File > Export Wizard > Continue > (Click “The Web”) Continue > (Click Exit if it appears) > Then on the “Format” option on the drop down click “PNG 8” the set it to 256 colours then using the transparency picker click on the background (The “mid” gradient colour) of the logo within the preview window. This will then remove that colour from the logo leaving a transparent background. You may notice the edges become slightly “bitty” but that’s fine as these will not be noticeable on the website and will blend nicely with the background.
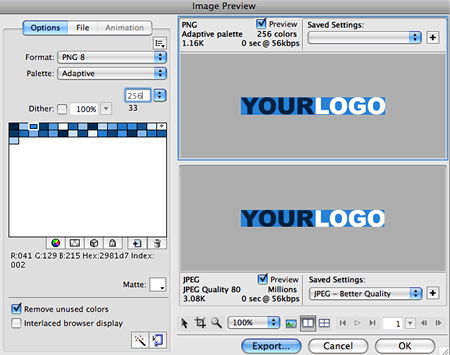
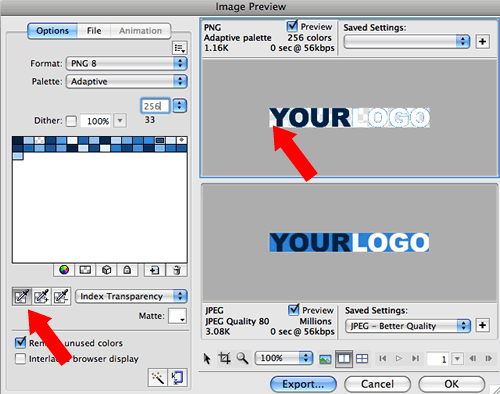
Note:
If your logo has already got a solid colour as the background – you can remove this at the export stage when picking the colour of the index transparency. For the best result, make sure you adjust the colour of the gradient to match the background colour you removed from the logo so it blends nicely on your website.
We’ll be exporting the logo using index transparency and as a PNG8 – we won’t use the Alpha transparency option as this renders the edges jagged within IE6. PNG32 will create a grey background in IE6, so it’s best to avoid that as well.
Creating the website
Using a few lines of XHTML and CSS i’ll show you how to create a gradient header for your website and also how to align your logo properly on top.
Step one: The Structure
Below is the basic code to create the basic structure of your website & header.
The #container div will contain all your website elements and can adjusted accordingly. The #header div will contain your logo and have the gradient background style applied to it.
<body>

<div id="container">

<div id="header">

<p><img src="logo.png" alt="Your Logo Name"></p>

</div></div>

</body>
Step two: Styling the header
Add the following into the <head> of your document.
The following code assumes your images are in the root of your website relative to your homepage/index.html
<style type="text/css">

body {margin: 0; padding: 0; background: #e4e4e4;}

#container {width: 900px; background: #fff; height: 500px; margin: 0 auto;}

#header {width: 900px; height: 150px; background: #06c url(gradient.png) repeat-x top;}

.logo {padding: 60px 0 0 60px;}

</style>


Have you got my office bugged? We have been playing with this very problem over the last couple of days! The air was blue at times!
I thank you from the bottom of my frustrated heart! Excellent!
I have been playing with web site builder plus the last few days with another web site, based on the principle of I need to know how it works to offer support to my clients.
I hesitate to mention this (especially in this thread) as I am a huge fan of Heart internet, but I have another issue, if you could incorporate doc type declarations on the template pages in site builder plus it would be very helpful. Especially as search engines look for them. This is not a problem for me because I have downloaded the pages and will insert the missing meta tags where required (no follow etc.) and Doc type declaration manually with my own software. But this is not satisfactory for my clients as the package is sold as “build your own without coding knowledge”
I hope this is not black hat in another thread but I was going to ask anyway. Thanks again for the tutorial.
Paul
It worked like a charm on my web site – thank you.