Static deliverables like wireframes and mockups often demonstrate the structure and aesthetics of an application but fall short of illustrating the feeling and emotion of it. In some cases, the final static deliverables always have to be adjusted due to technical restrictions or content changes. Other drawbacks are that microinteractions and animations are sometimes neglected during the whole design process, making the experience feel stale and unintuitive. From having an abundant amount of design artifacts to struggling to collaborate with other designers, there has to be a way for designers to compose every aspect of the experience without increasing the amount of time and energy to do so. Let’s learn how front-end prototypes can be a great option for you and your team.
A prototype is an effective method for designers to communicate and present ideas to stakeholders in an inexpensive way. The ability to combine different features into one prototype is a great way to tell the story from the user’s perspective. Alastair Simpson from Atlassian said it best in his article “Why prototyping is a must for designers”, which stated:
“Just like a picture paints a thousand words, a prototype can paint a thousand user stories.”
The benefits of prototypes
In the case of digital products, the main purpose of a prototype is to have a sample application that can be used to test and validate early concepts of a feature. But why do we create prototypes? Here are a few reasons:
Communicate ideas – “Don’t tell them, show them” is a great motto to have as a product designer. A prototype is a great way to communicate and sell concepts to others.
Uncovering edge cases – The earlier you discover edge cases, the cheaper it is to solve them. A prototype is an effective way to find them.
Test usability early – Having the ability to test and validate solutions early in the process will increase the chances of successful features.
Display states – When building complex applications, there will be many UI states like default, error, loading and interaction. Prototypes will allow you to display these states within the context of the user workflow.
Types of prototypes
There isn’t just one way to prototype. For digital products, there are three traditional ways it can be done:
The paper prototype
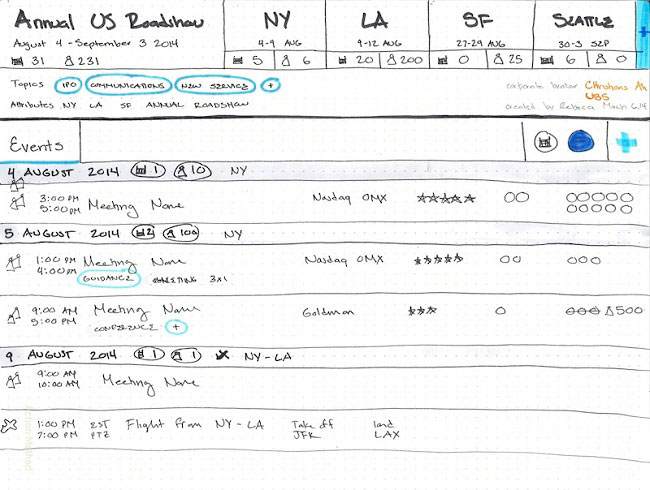
An example of a paper prototype a colleague and me created for a calendar view
The purpose of a paper prototype is to validate early and rough concepts. It’s best to create these in the process with the whole team (designers, engineers, product managers and stakeholders).
The lo-fidelity prototype
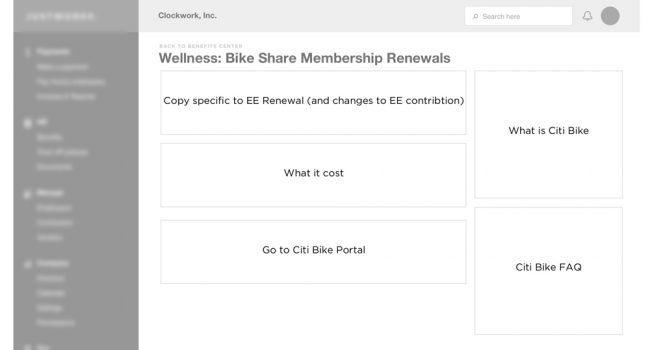
An example of a lo-fi prototype I created for a learning page
The purpose of the lo-fidelity prototype is to validate the user journey and information architecture. This is where you start incorporating in content and putting together clickable screens.
The hi-fi prototype
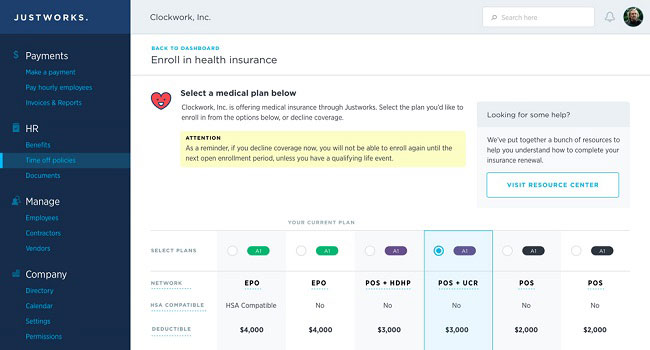
An example of a hi-fi prototype I created for a health insurance selection screen
The purpose of the high-fidelity prototype is to validate the look and feel of the final designs. This where you want to nail down the visual direction of the feature with design elements such as colour, form, line, shape, space and typography.
Common drawbacks
These methods help to validate solutions in their own way. But they all share common drawbacks. Here are the top three pain points:
Creation of many artifacts
Have you ever questioned if the design you were viewing was the latest one? Or maybe you tried to version control your design files but ended up with a lot of files that no one would ever open again. I have over a decade of experience in this industry, and for me the hardest part is still categorising and organising artifacts. And this gets more difficult, the more designers work on the product.
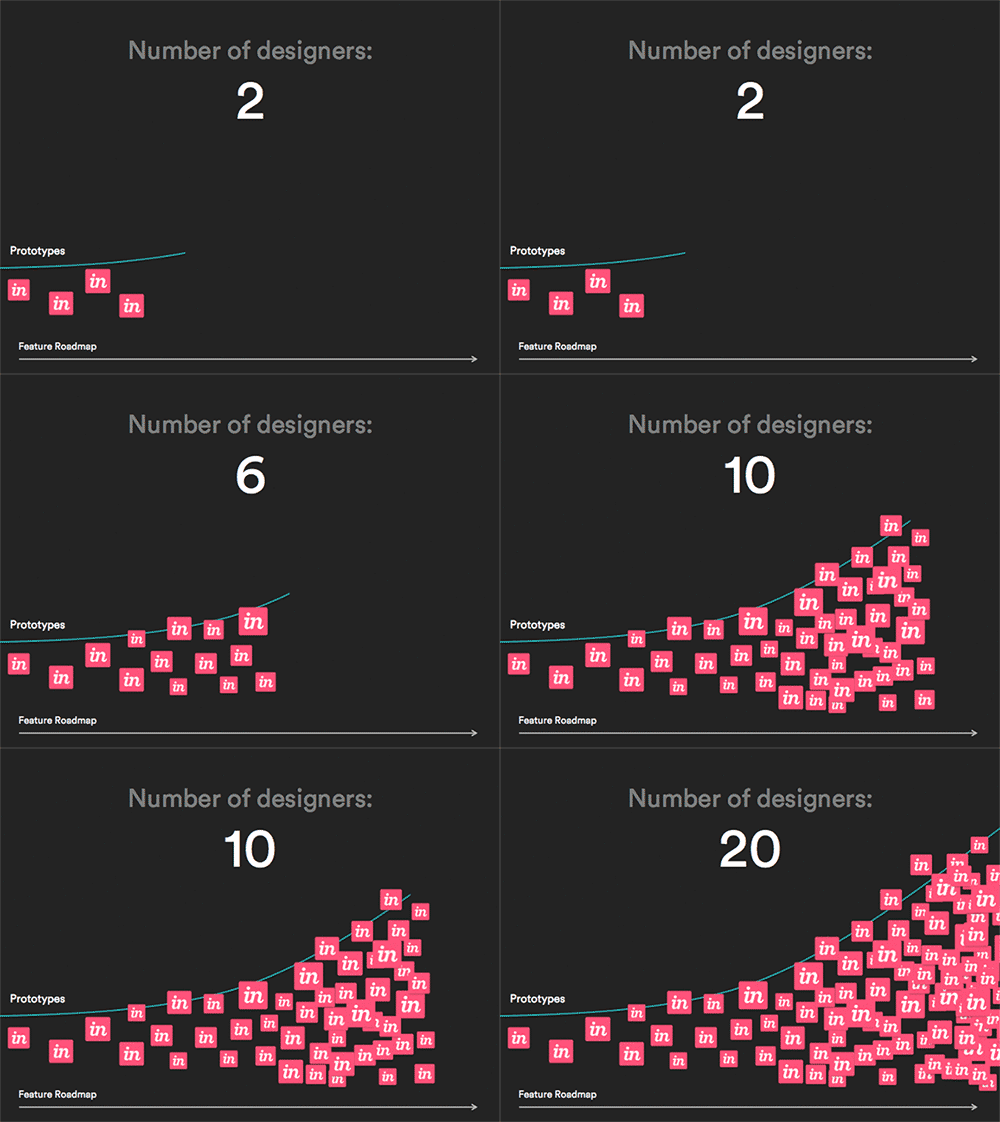
A visual illustrating the correlation between the feature roadmap and the number of designers (by Atif Azam)
The prototypes don’t simulate the experience
The UI is just the tip of the iceberg in UX. Animation, microinteractions and performance all play key roles in the experience of the application. What all these prototypes fail to do is illustrate the feeling and emotion of an application. You could create microinteractions and animations in programs like InVision or Principal but the problem is that they might not look the same across different browsers and devices.
Collaboration isn’t easy
As a design team grows, there will be a time when multiple designers have to work on one feature. The problem is that there aren’t many tools for designers to collaborate on the UI, UX and interaction design aspect in an efficient manner.
Enter the front-end prototype
Before I tell you why front-end prototypes are awesome, let’s define what they are.
A front-end prototype is a prototype that has been built with HTML, CSS and JavaScript. The purpose is to demonstrate a realistic experience with data and content.
Now let’s talk about why they are so important.
One master deliverable
The top benefit of a front-end prototype is having one master prototype that the design team can deliver to the engineering team. At any point a designer can branch off the master prototype and start building a new feature. Once the feature has been tested and validated, it can be merged back into the master prototype.
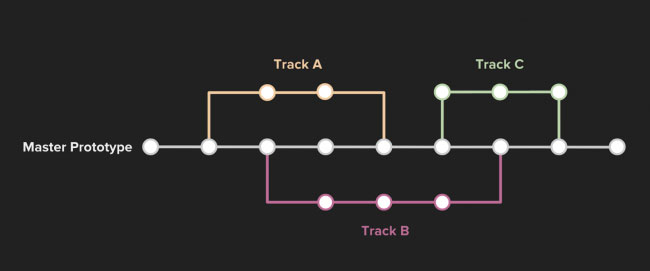
A diagram of a typical front-end prototyping process. As you can see, it’s very similar to how engineers work
Utilising real data and content
Another wonderful benefit is the ability to use real data and content in your designs. Do you remember those days of using Lorem Ipsum in your designs but when you got the real content, the design broke? You can save time and energy by using real data and designing around it. Users aren’t using the application because of the beautiful UI design, they are using it because of the content it provides. There are two ways of incorporating real content into your prototypes: a static data file (in JSON) or an API. Both of these have their pros and cons, so choose the one that works best for your team.
Designing the “real” experience
With a front-end prototype, you can design every nuance of the product. From loading animations to UI microinteractions, all of these can be designed to the smallest detail, which will make for a better product experience.
Getting started with front-end prototyping
So you have decided you want to start front-end prototyping? Great! But where should you start? Here are the three foundations:
Code conventions
Code conventions are a set of guidelines for how code should be written. Having these will make it easy for designers to jump in and out of projects, conduct efficient code reviews and develop faster.

Mark Otto has created a great example of code conventions.
Style guide
Once the code conventions have been set, you can start on the style guide. A style guide consists of branding guidelines that illustrate the look and feel of a product. Here is where you produce principles for design elements like colours, typography, buttons etc. For the code, I like using the Functional CSS methodology (aka Atomic CSS) because you don’t need to write new CSS to create the UI. Using a combination of CSS classes, you can create all the UI from markup.
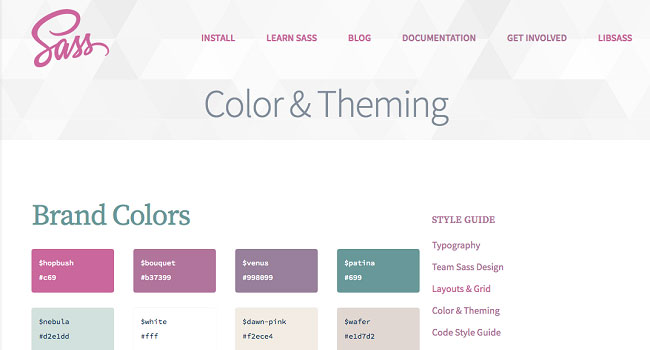
The style guide of the Sass-lang site
Pattern library
Prototyping becomes much easier if you have a set of patterns you can use within the designs. A pattern library is a collection of reusable components. Here is where each pattern is documented to define the purpose, usage and variants (variations of the pattern).
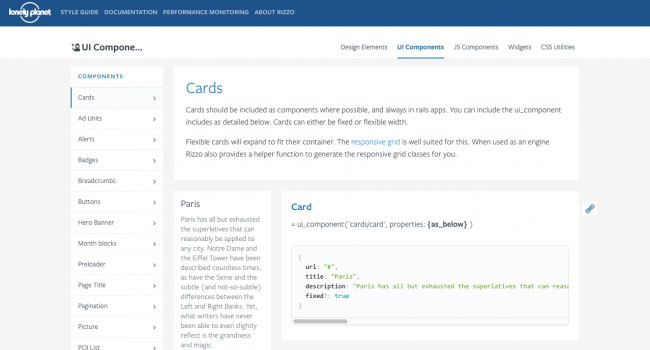
Pattern library for Lonely Planet
Choosing your platform
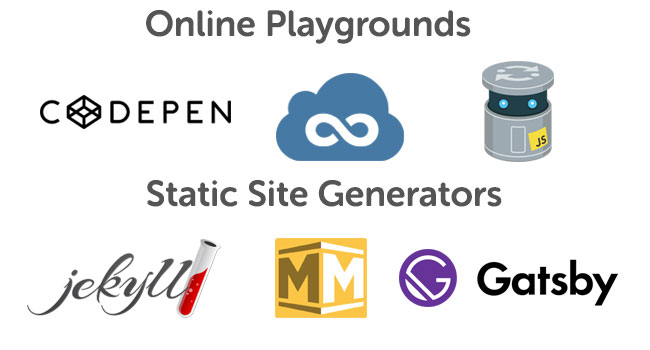
Once the foundation is all set, the next decision to make is what platform you want to build your prototype on top of. You have two options:
Online playgrounds like CodePen, JSFiddle and JS in.
Static site generators like Jekyll, Middleman and Gatsby.
Online playgrounds would be a great option if you want to quickly prototype a single feature. If you want build whole workflows, use real data and have an effective artifact for user testing, static site generators are probably the better option (but keep in mind that, if you are using proprietary information, you probably can’t use data on these platforms). There is a bunch of static generators you and your team can use, check out www.staticgen.com to learn more about them.
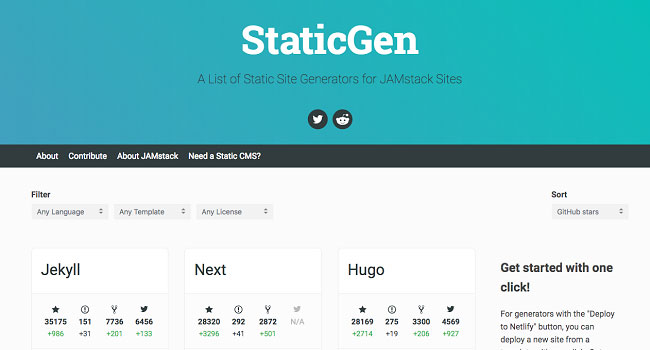
To see a ranking of static site generators, check out StaticGen
The front-end prototyping process
The great thing about the front-end prototyping process is that it’s pretty straightforward. Here are the three steps I usually follow:
Import the data
After I go through a round or two of sketching and wireframing, I usually have an idea of what solution (or solutions) I want to explore further. The next step is to find the data I need and put them into a JSON (or YAML) file. For this example, we are going to build a page for the founding members of the Justice League.
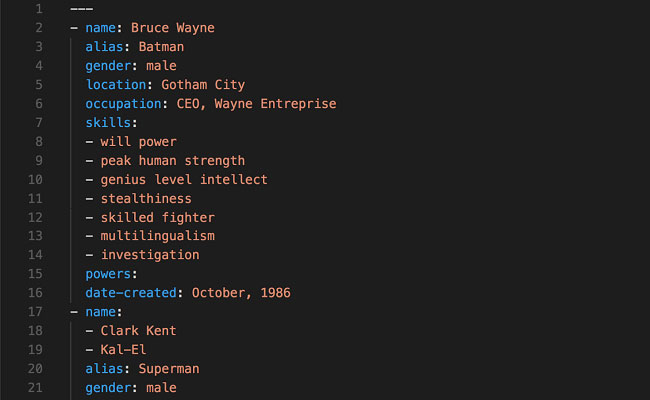
Content for the Justice League site
Add content with markup
Once you got the data, it’s time to import it into your markup. There are many ways to do this, but my favourite one is using the data each feature in HTML preprocessor Slim to dynamically add data into your markup. The great thing about this is that it separates the markup from the content and keeps the markup super clean. From here, you can start structuring the content.
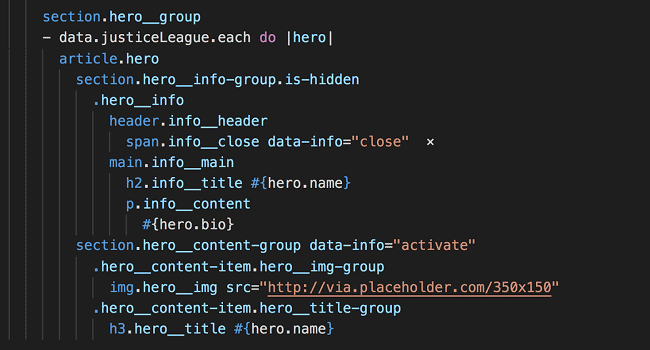
Structuring the content on the page
Give it some style
Since we are using BEM, it will be easy to scope our styles to the component. Let’s say we want to give them a different colour border to make it easy to differentiate them from each other. A quick way to do that is to add a modifier with the character’s name. To do that, you can add class=("hero__info-group info-group--#{hero.alias}") and then write styles for each of the characters (ie info-group--superman, info-group--batman or info-group--wonder-women). The result is that each of them has the same structure with small style differences.
Add some interactions
When your prototype has structure and style, you can focus on the interactions. This is what separates front-end prototypes from the rest of the prototyping methods: the ability to use realistic interactions and animations. You can adjust the interactions and design based on screen size, browser, internet speed and other things. For our example, I decided to apply a simple hover effect to each of the components:
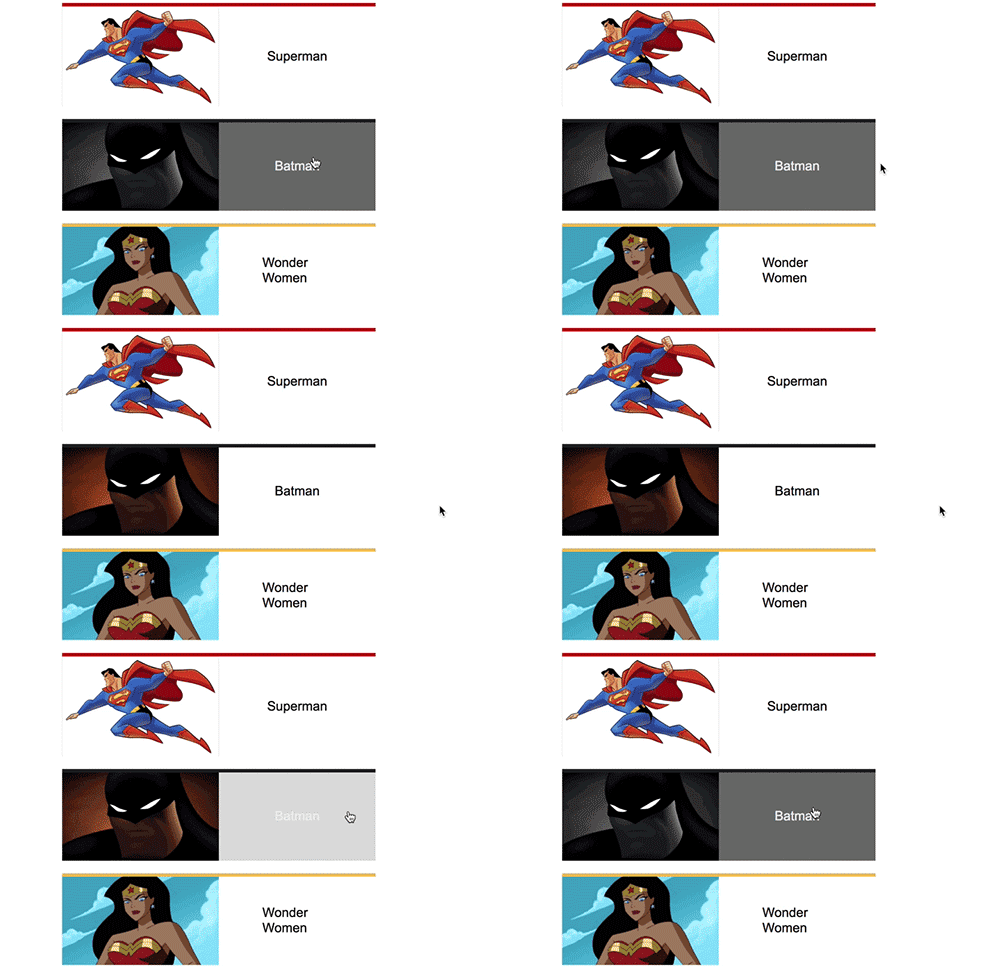
Incorporating interactions
As products get more complex and teams get bigger, it’s important to build products with the best user experience possible. Front-end prototypes allow designers to bring “experience” to the user experience. When you combine front-end prototypes with the other prototyping methods, you will empower your designers to build every step of the experience, from concept to completion.
Two rules to keep in mind
Front-end prototypes aren’t for every team, but if you do choose them, it’s important to keep these rules in mind:
Keep it simple
It’s best to not over-complicate front-end prototypes. Speed is important when prototyping and if there is a lot of friction between the idea and implementation, it can lead to frustration and lost opportunities. When you are prototyping, the tools should be as frictionless as possible.
Front-end prototype <> production application
If you want to maximise the benefits of front-end prototyping, there should be a relationship with the production application. One benefit could be the reuse of the CSS. This might be hard to do with BEM but it’s possible with Functional CSS since the whole idea is to build UIs without writing new CSS. If you and your team can make that happen, it will reduce the time needed to build new features.
If done well, a front-end prototype can be a great asset. Not only does it package all the design decisions into one deliverable and is a great asset for user testing, but it will also strengthen the relationship between design and engineering teams. If you are not using them now, try them out on a small scale and see if it’s a great fit for you and your team. Happy prototyping!
Comments
Please remember that all comments are moderated and any links you paste in your comment will remain as plain text. If your comment looks like spam it will be deleted. We're looking forward to answering your questions and hearing your comments and opinions!