We all know that testing is important, but this is often limited to unit testing and integration testing, focusing on the back-end of our application, and we tend to forget about testing the front-end. There are so many different types of tests that we need to run on the front-end, it’s hard to know where to start. There’s accessibility testing, performance testing, user testing, HTML validation, visual regression testing and UI testing — not to mention the countless tools available for each type, and the different ways to set them up.
To help get you started, we’re going to look at just one thing in particular in this article: UI testing with Cypress.
What?
User interface (UI) testing is done on the front-end of the website and makes sure that the users can do what they’re supposed to be able to do. Can they click on the buttons, can they see elements that they should be able to, can they type where they’re supposed to, and does it respond the way it should?
Cypress is an open source tool for end-to-end testing, which involves testing the application from the start to the end (end to end). The capabilities of Cypress are extensive, but for the purpose of this post we’ll just concentrate on UI testing. It’s compatible with Windows, Linux and Mac, and language agnostic (which means it can be used no matter the language your website/application is written in). The free version covers three users and 500 test recordings per month.
Why?
The UI is what your users see, when they interact with your application. It’s what they look at on the device, what they click on, what they enter information to — and they expect it to work. Running UI testing can help automate checking that the application works the way it was intended, on different browsers and at different screen sizes.
For a number of reasons, your code may affect areas of the application that you didn’t expect it would. A change in stacking order could mean that a key button is no longer clickable, a form may no longer submit properly, or content may no longer appear on the page at smaller screen sizes. UI testing allows us to automatically run these checks as part of the deployment pipeline, so we can catch issues before the users see them.
This kind of UI testing can also be used as a more forgiving alternative to visual regression testing, which is a pixel-by-pixel comparison of two website screenshots (one before the change, one after), to make sure that nothing has changed. Unfortunately, this kind of test often yields false results as content may change or images or other assets may not load properly. UI testing can be useful when you don’t need to know if the page is pixel-for-pixel identical to before, you just need to make sure the right elements still appear on the page.
How?
Installing and running Cypress
One of the reasons to use Cypress for UI testing is that it gives you something to get started. Install Cypress in your project using npm or yarn.
Note: If you’re on Windows and use WSL, you’ll need to install Cypress on Windows instead of in the Linux subsystem, so that it can access your browsers to run the tests.
npm install cypress
When you run Cypress for the first time, it will generate a folder called cypress inside your project and include all the files you need (including a couple of example tests).
cypress open
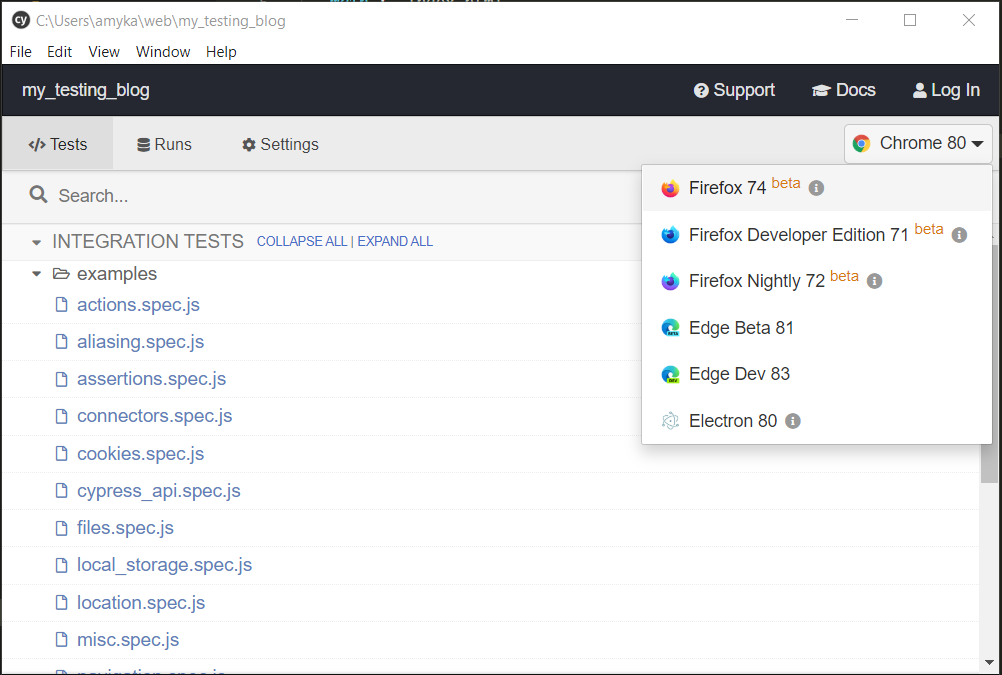
When you run Cypress, it will open the task runner, and list all the tests you have available to run (they include a folder of examples to start with). In recent updates, they now also include several other browser options (before then you could only test with Chrome or Electron browsers).

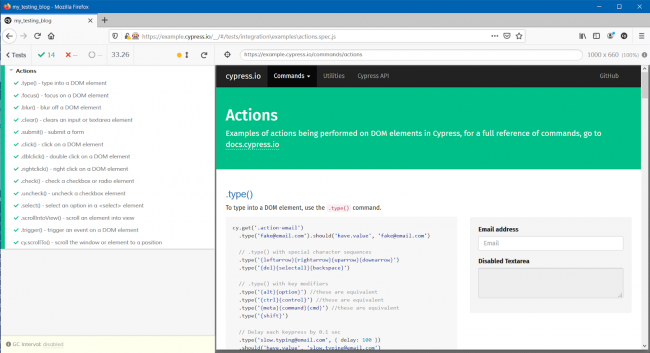
From the task runner, you can run individual test files by double-clicking on them, or use the Run all specs option. This will then load a new browser window and iterate through the written tests that you’ve defined.

Writing tests
Any tests for Cypress should be saved in the cypress/integrations folder. There should be a folder example in there with some pre-created test examples. Cypress bundles together Mocha, Chai and jQuery to build its tests, which can be a little strange to work with at the start, but it gets easier.
You can use the before and after hook to specify conditions to be completed before and after your tests are run. Or you can use the beforeEach and afterEach hook for it to perform the conditions before each test.
The full list of assertions that you can use in your tests is available in theCypress docs. You can use jQuery for their element selectors (similar to querySelector in JavaScript). Chaining togetherassertions andcommands, you can check for the existence of a particular HTML element on the page, and make sure that it is visible.
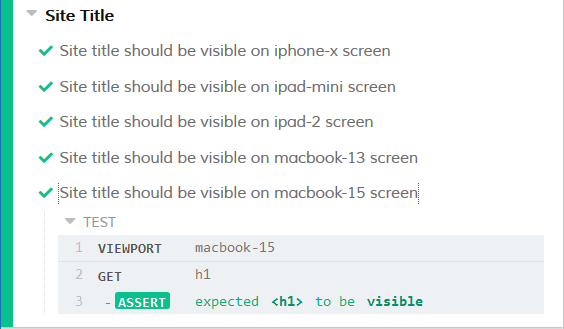
Because this is testing the UI, you can also change the viewport size to ensure that the tests still pass on various screen sizes.
You can also use JavaScript inside your tests to iterate over various test configurations, so that you don’t have to duplicate your code.

Once you’ve made sure that everything that is meant to be on the page is there (and visible), you can ensure the links are clickable and do what they’re supposed to. Using the click action you can make sure that all the clickable elements can be clicked on and go where they’re supposed to.
Similarly, you can use Cypress to fill out forms and make sure they do what they’re supposed to.
The actions available in Cypress extend beyond clicking and typing in fields. There’s a repository of sample tests available on Cypress’ GitHub, which includes more advanced functionality such as drag-and-drop behaviour, loading of static resources and additional form inputs such as select or range fields.
But…
While Cypress is a very useful testing tool that can help make the task of testing the front-end easier, it’s not the answer to everything. Cypress can tell you that an image is where it’s supposed to be, but it can’t tell you if the image has been distorted. You’ll still need to carry out some manual testing, or use a different testing method (such as visual regression testing).

Using Cypress to test your application’s UI is certainly a good step to take. However, it’s just one of many. You should also consider other areas of front-end testing, such as accessibility testing, performance testing, and user testing. Find out more about these tests in Getting Started with Front End Testing, an article that I wrote for JavaScript January earlier this year.
Comments
Please remember that all comments are moderated and any links you paste in your comment will remain as plain text. If your comment looks like spam it will be deleted. We're looking forward to answering your questions and hearing your comments and opinions!