
If you have an email account with Heart Internet, either through a hosting package or on its own, you already know you can check your email through our WebMail. And you may know you can set up your computer to download emails using IMAP or POP.
But what if you have a particular application you want to use? What if you want to check your email on your phone, your tablet, or your desktop? What if you want to import it into another webmail client?
We're here to help you with our new Email series. We'll go through some of the different devices and systems you can use to check your email, giving you step-by-step instructions to make light work of those tricky control panels and preference screens.
And we start with the newest kid on the block – the new Windows 10 Mail app.
Windows Mail for Windows 10
With practically everyone taking advantage of the free upgrade to Windows 10, it's only natural that people are also taking advantage of Windows Mail, the built-in email application that lets you download emails from multiple accounts onto your computer.
Along with letting you choose a background image just for the app and putting new messages in your Action Centre, you can set up your Heart Internet email accounts in your Mail by entering in just a few details.
Getting your email details
Before you can add the accounts to your Mail, you need to remember what your account details are.
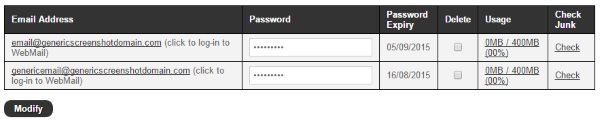
To get your email account details:
- Log into your eXtend Control Panel using extendcp.co.uk or going through the Heart Internet Customer Area
- Click 'Mail Boxes' under the 'Email' panel
- Under 'Modify Mail Boxes', find the email address you want to use
- Make sure you know your email address details and password
Adding your email account
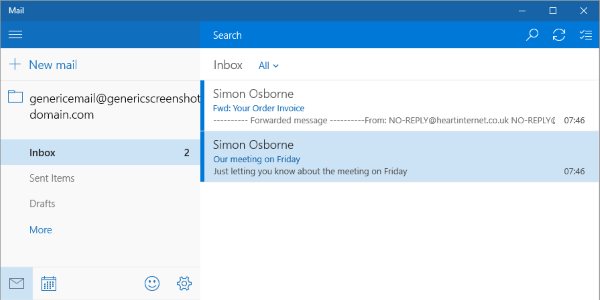
Once you have your details, it's time to open up Mail. Using the new 'Start' menu, click the 'Mail' icon, and it will load up.

When you open it up for the first time, you can click the 'Get Started' button and it'll take you straight to 'Add Account'. If you're already added another email address, you'll need to go there.
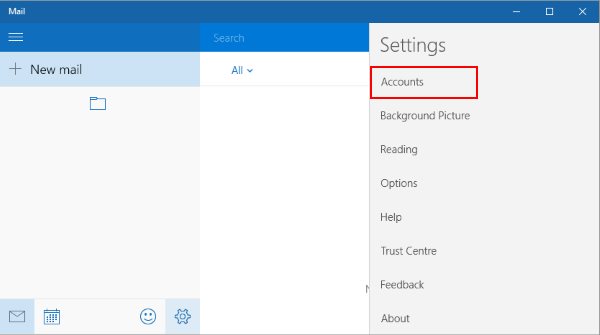
To get to the 'Add Account' screen:
- Click the Cog icon on the bottom right of the application
- Select 'Switch to Settings'
- Click 'Accounts'
- Click 'Add Account'

Once you're in the 'Add Account' screen, you'll need to get to the 'Advanced Setup' to properly set up your email. Currently, Mail tries to automatically connect to your email account using an SSL connection, which you can't do with your email account. But if you set it to use a standard connection, everything runs perfectly.

To set up your email account:
- Click the 'Advanced Setup' button
- Click 'Internet Email'

- Enter in the following details, using your email account details:
Account name: [Your email address]
Your name: [The name you want to use]
Incoming email server: mail.[Your domain name]
Account type: IMAP4
Username: [Your email address]
Password: [Your email password]
Outgoing (SMTP) email server: mail.[Your domain name]
- Then ensure that the following two checkboxes are checked:
Outgoing server requires authentication – checked
Use the same username and password for sending email – checked
- And that these two checkboxes are unchecked:
Require SSL for incoming email – unchecked
Require SSL for outgoing email – unchecked

- Click 'Sign-in' and your email will be all ready to use!

Does this also work with my resell customers?
Yes. Just talk them through these steps we've shown you here, and they'll be able to get their email just like you are.
What if I have more questions?
If you have further questions about your email, please see our Support Database, or raise a ticket with our Customer Services team through the Heart Internet Customer Area.
We hope this has been helpful, and that you're downloading your email as you read this!
Why is Heartinternet still advocating using non ssl connections for pop and imap email connections. At a time when hosting and websites are being at an alarming rate. Surely you should be advising your less informed customers to be more secure not less.
SSL connections are supported, but we’ve had customers get confused by the domain mismatch error that appears when they use mail.[your domain].com.
Our SSL certificate points to extendcp.co.uk, so when you connect to mail.[your domain].com using an SSL connection, your mail client brings up an error that says “This certificate is not valid (host name mismatch)”.
The connection isn’t any less secure, and you can just click “accept” to move past it. But since it happens, it’s often easier to not use an SSL certificate.
However, you can also connect to your server’s generic hostname (like mail123.extendcp.co.uk), which you can connect to using SSL without any error messages popping up.
If you are a Reseller, you can find out which servers your domains are on by clicking on ‘Packages By Server’ under ‘Reports’ in the Reseller Control Centre.
I hope this helps!