

;)
;)
;)
;)
;)
;)

;)
;)
;)
When you pull your Managed WordPress site to the staging site, this creates a copy of your site. You can then edit this copy as much as you want without those changes affecting your main site.
Note: Any custom code or assets that are not stored in the /wp-content folder will not be moved to and from staging.
If you haven't done so yet, create the staging site before you begin.
- Go to your Heart Internet control panel and open the Managed WordPress product page.
- In your My Products page, next to Managed WordPress, click Manage All.
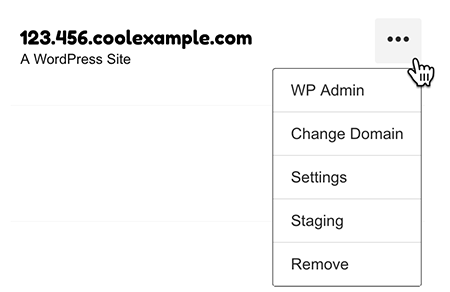
- or the website you want to use, click the three-dot icon and select Staging.
- Click Sync Options.
- Select Pull production to staging.
- If you want to copy your production site exactly as it is, select Overwrite content. If you made recent changes to your staging site, selecting this will overwrite those changes.
Warning: The sync process will only overwrite files by default. If you pull with Overwrite content selected, the database will also be overwritten. Make sure that the content you have in the production site is what you want on the test site before you pull the changes to staging.
- Click Sync.